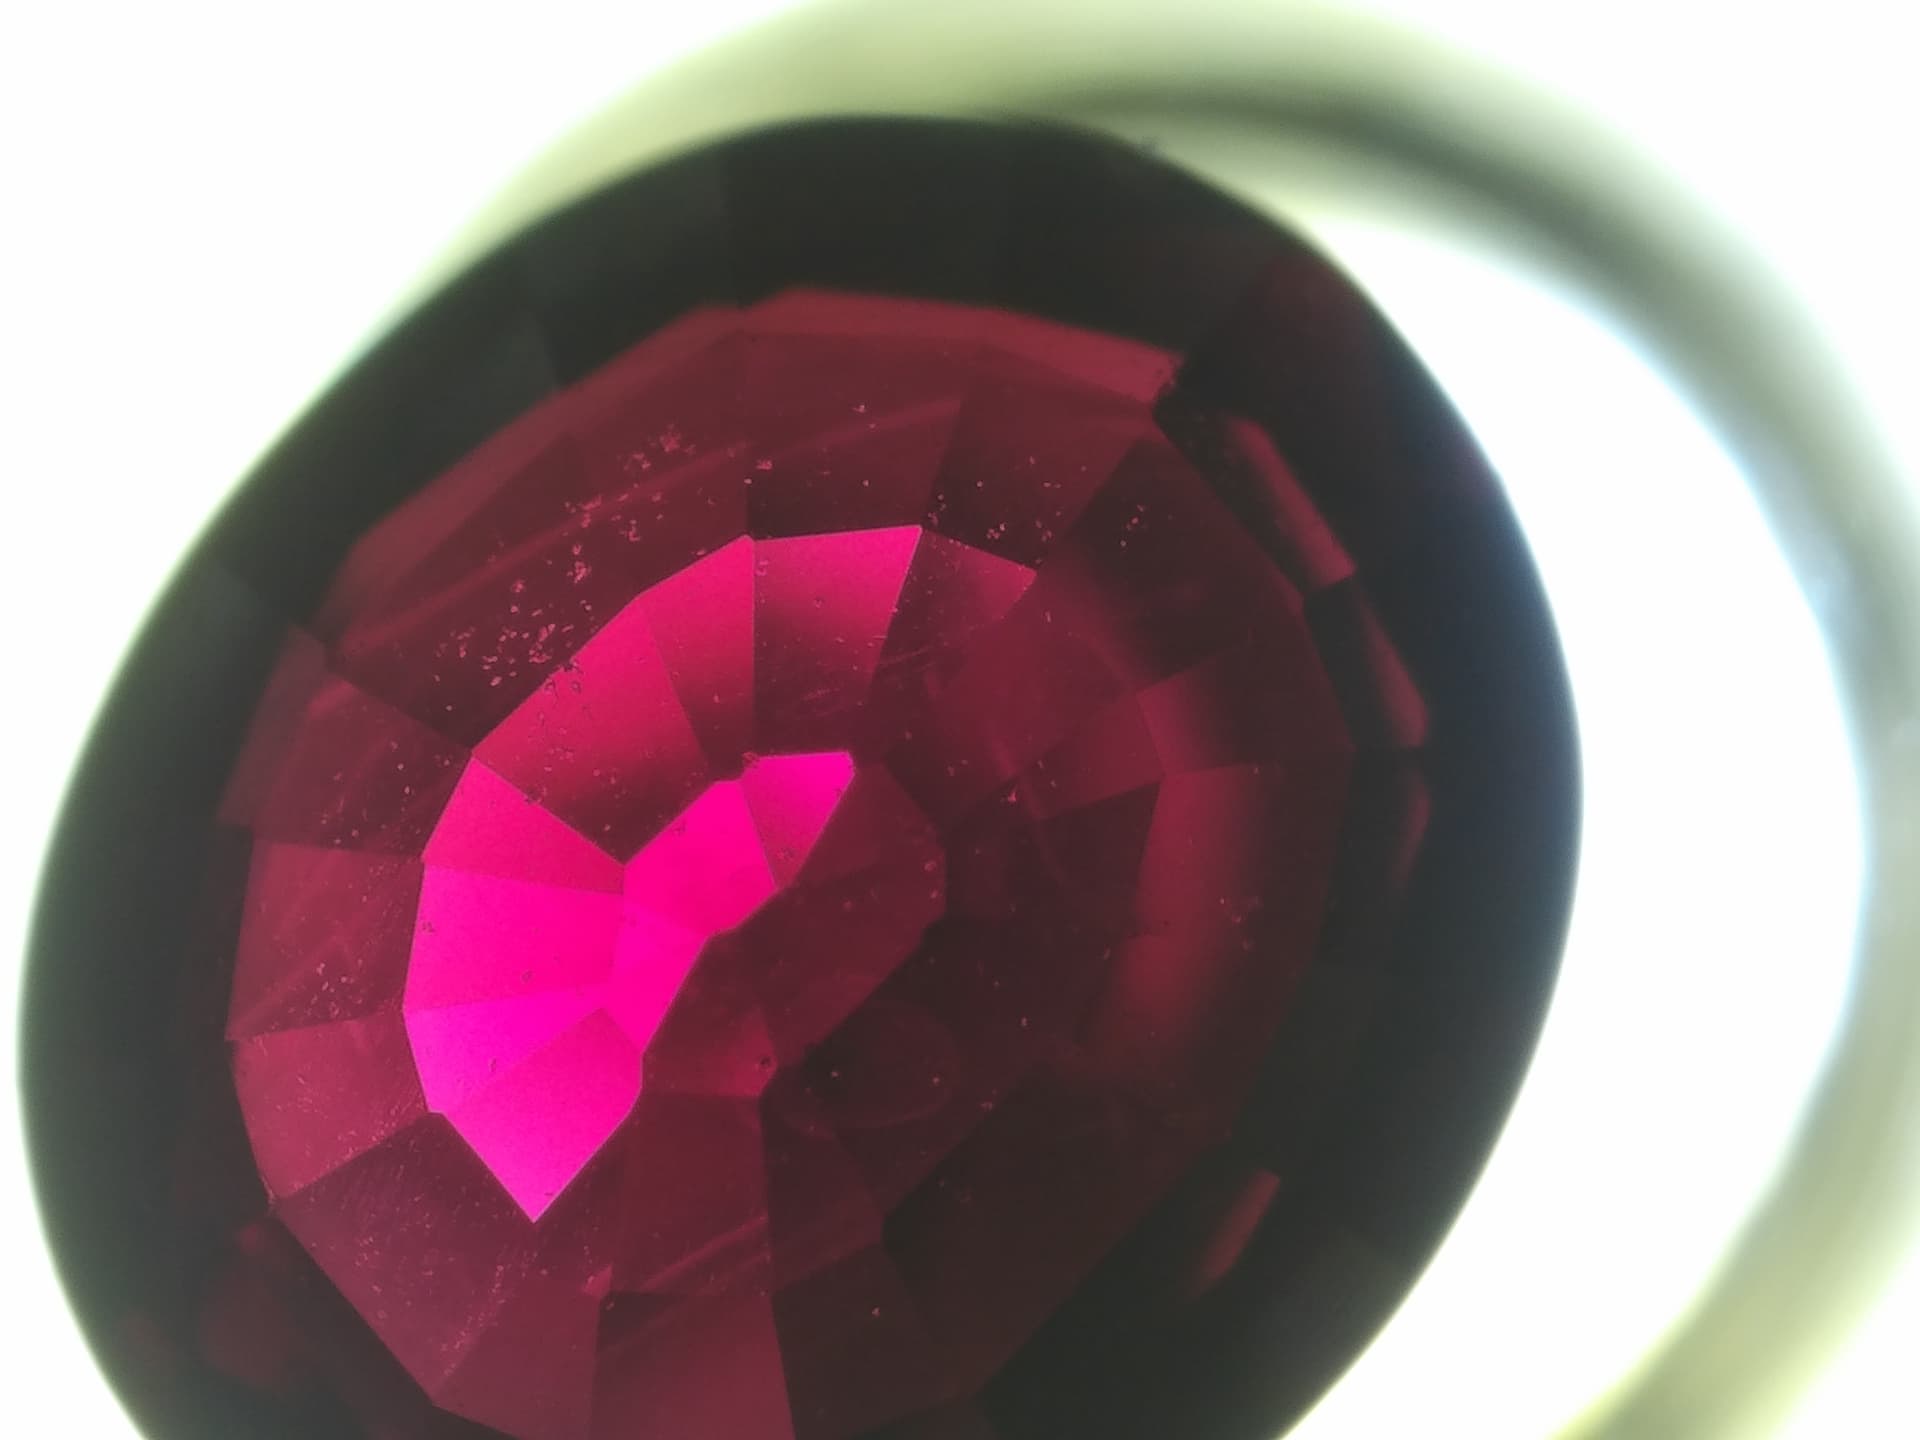
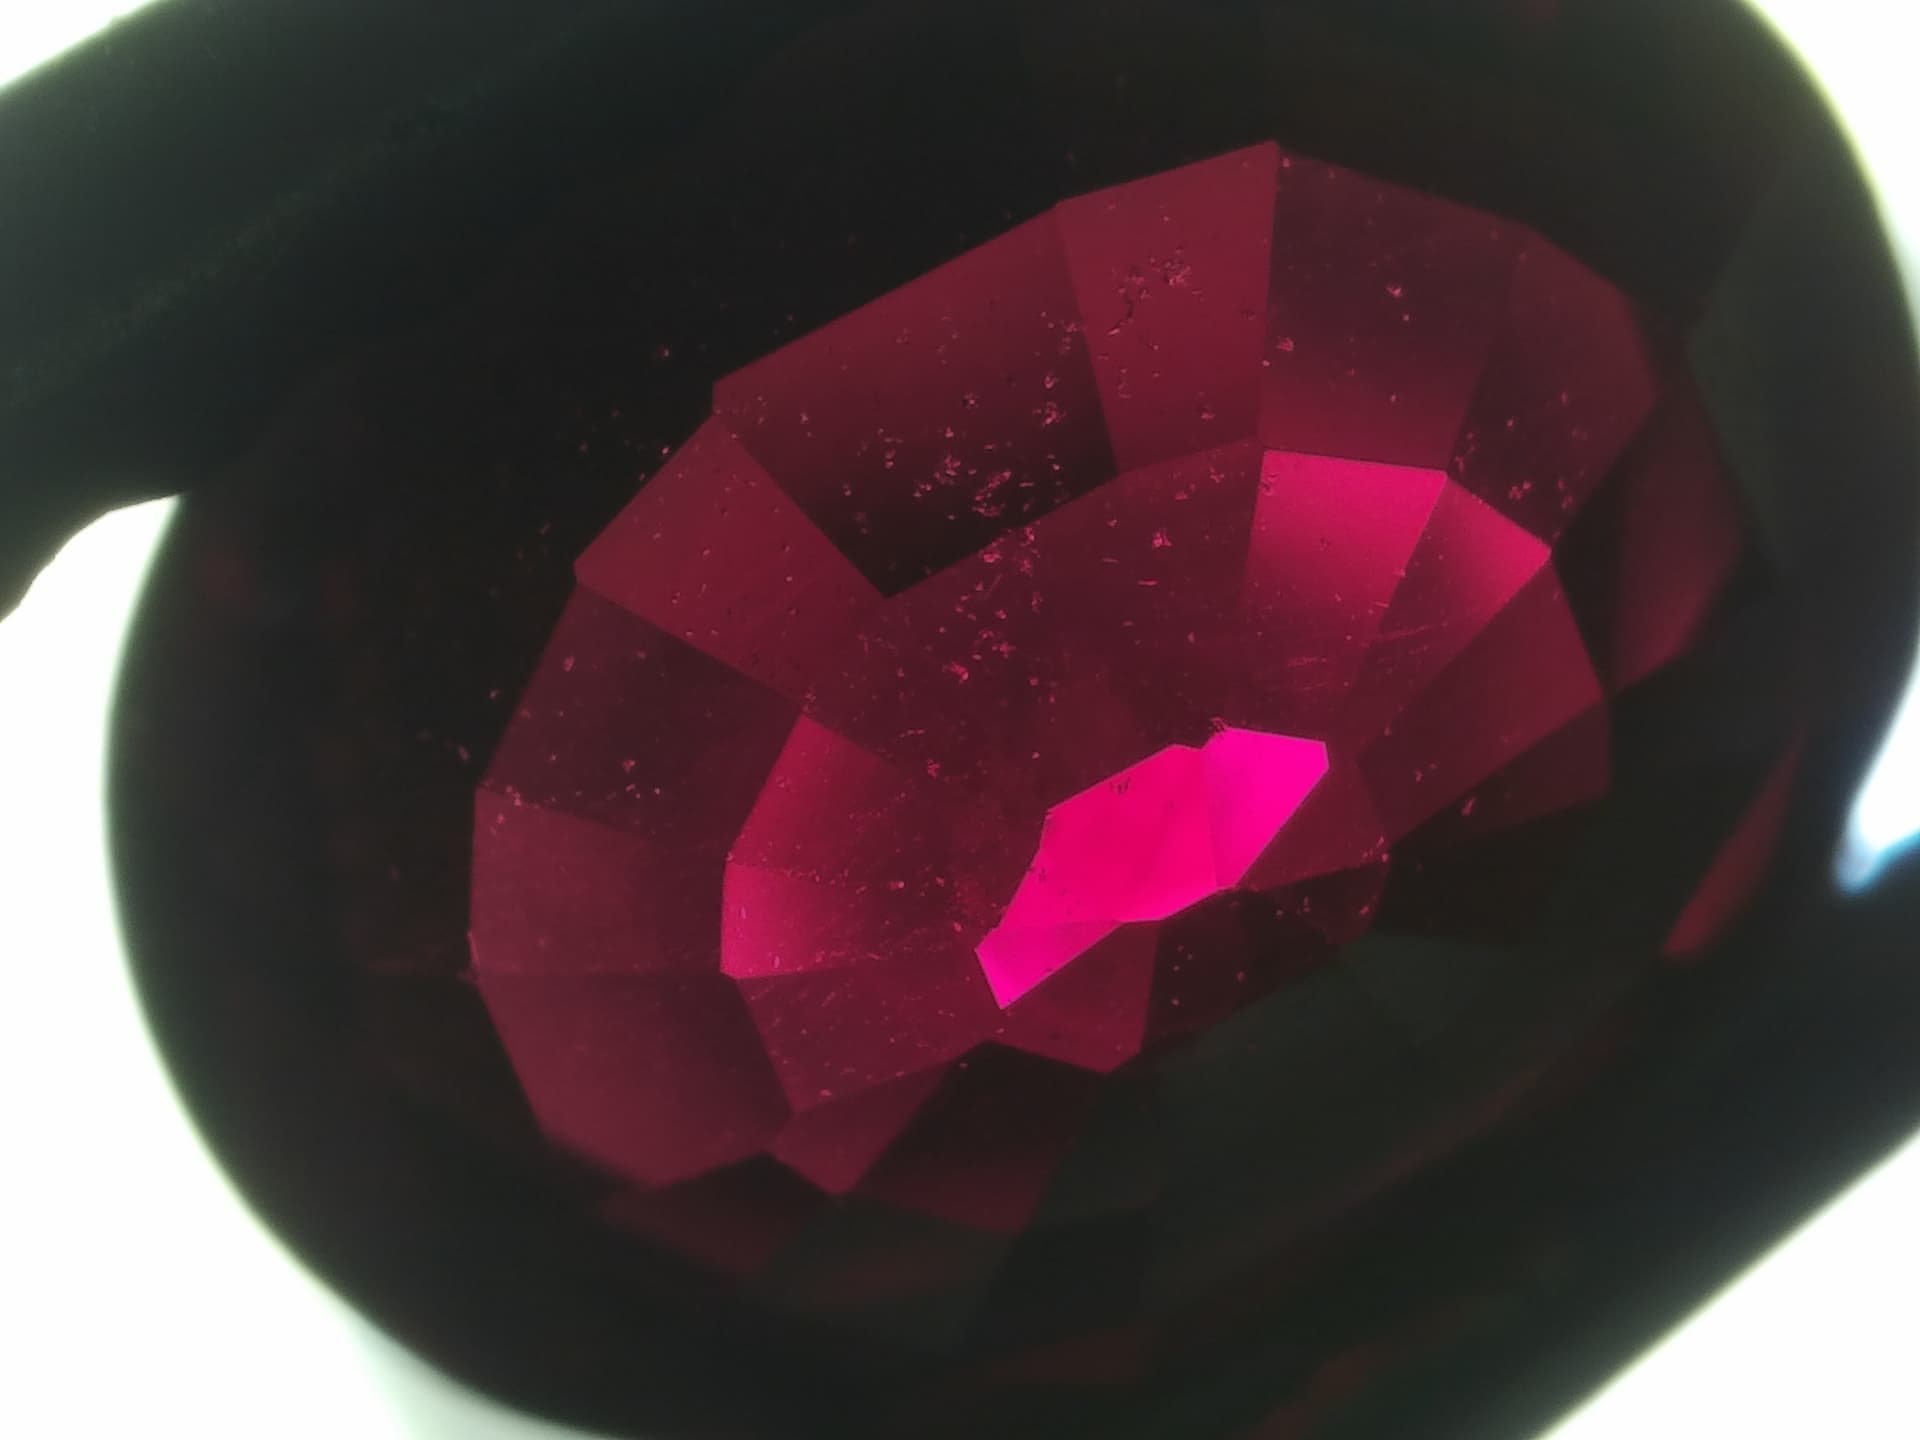
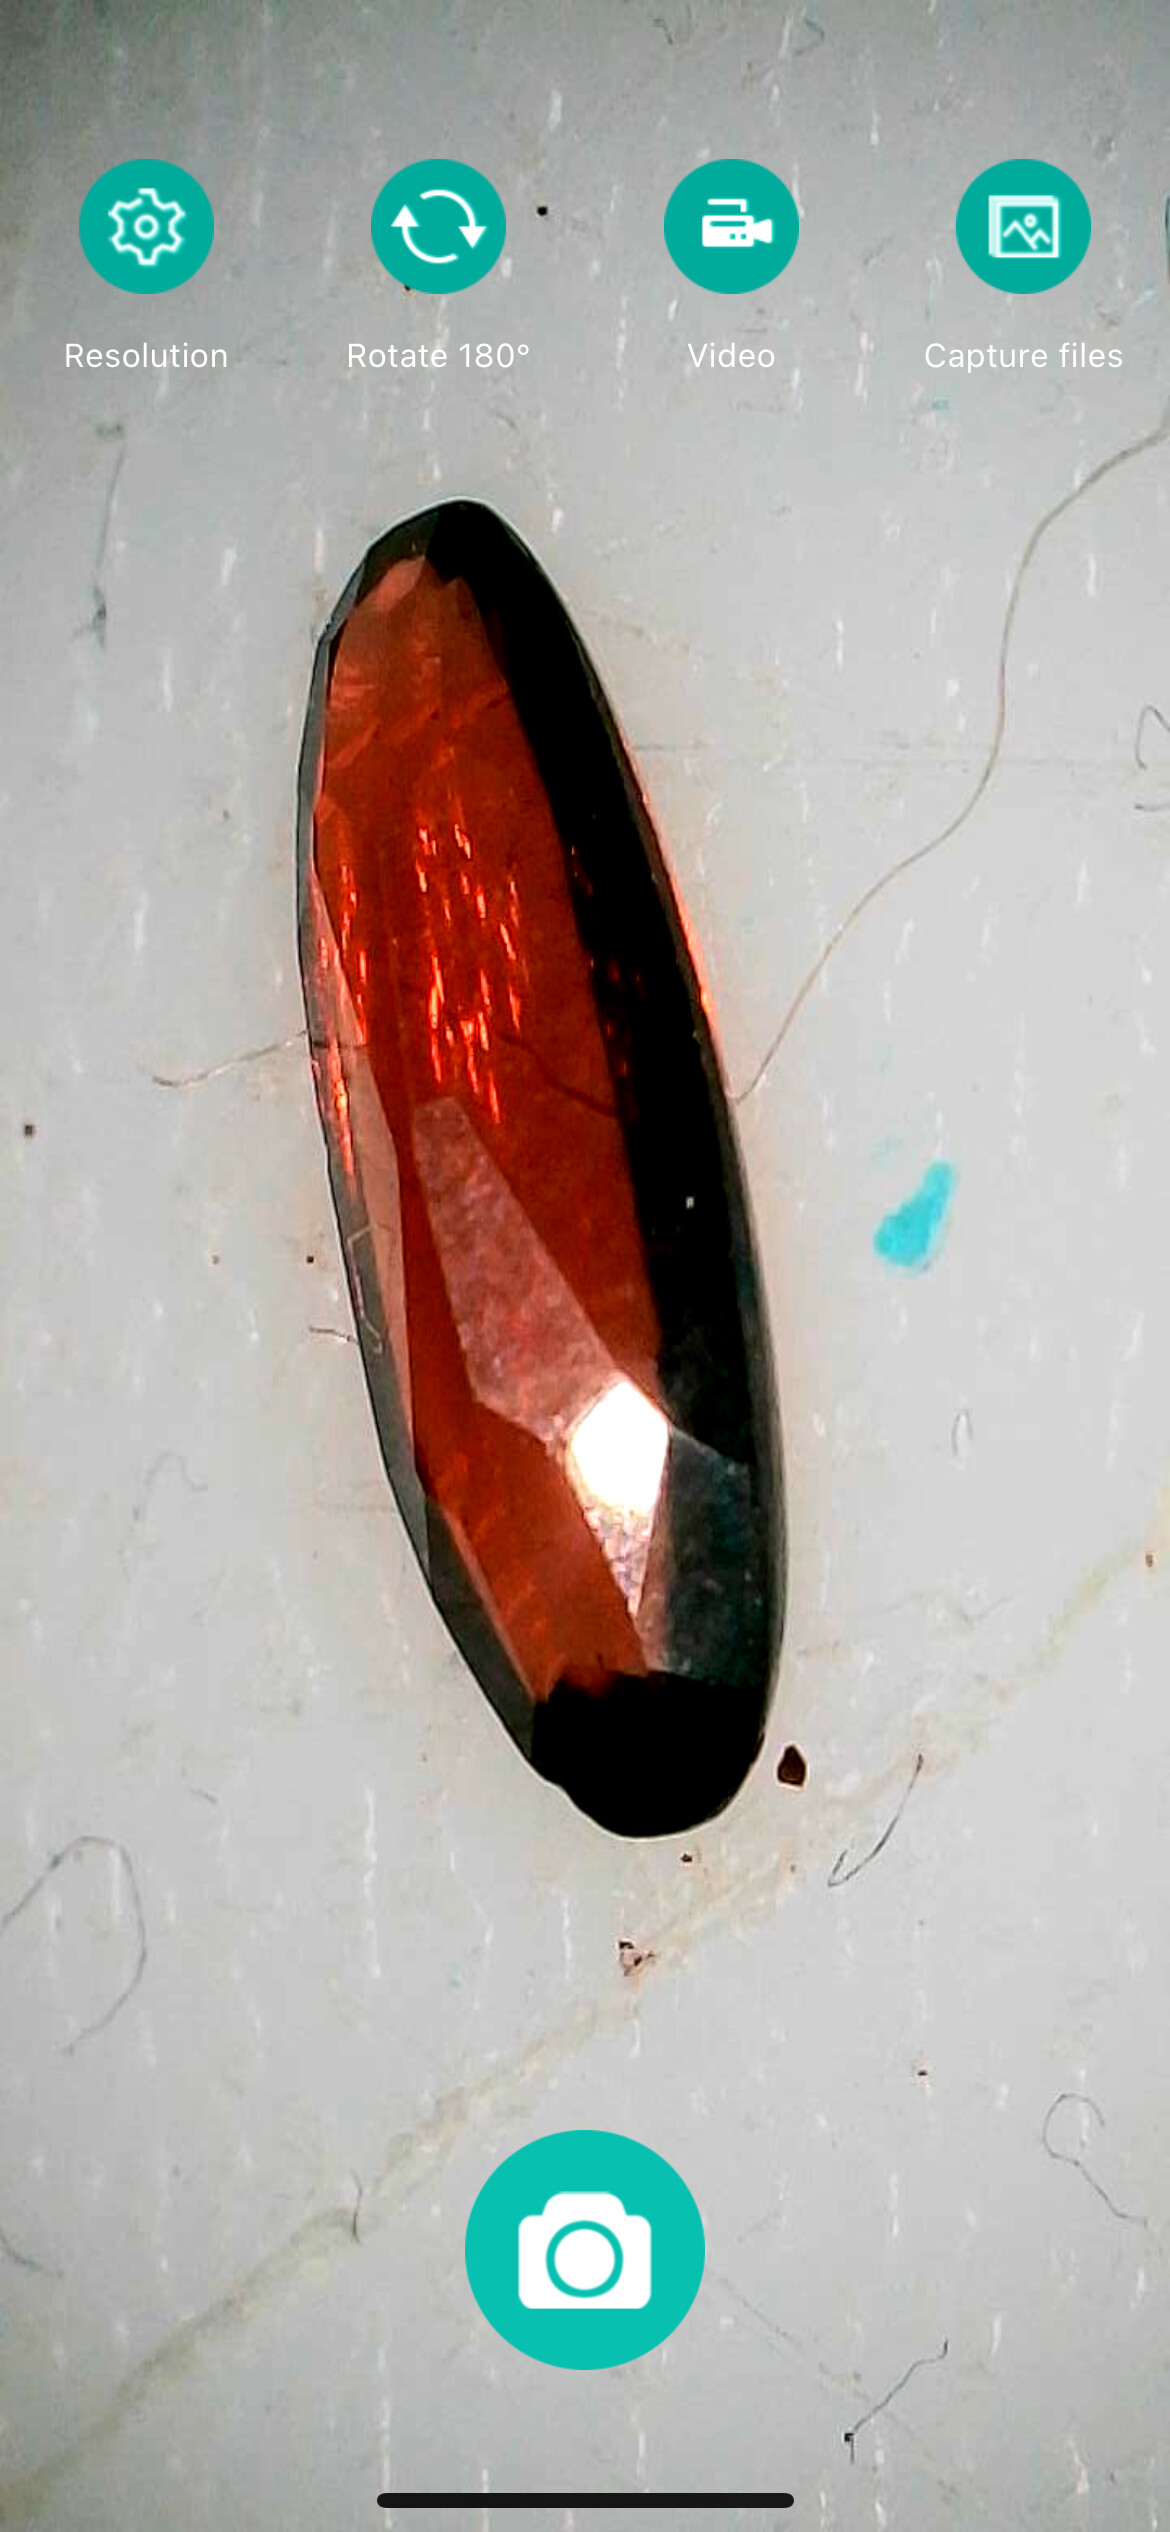
Collecting for 40 years and not an expert, just love gems. It’s really hard to take great pictures of gems, let alone the internal structure. I have not had it appraised but I do have a gemological report that is un treated. Going to send to a lab, just interested if there are a few experts on this regarding the visual… re: inclusions. I think they are bubbles but look like specks of anti matter lol. I bought this in Myanmar in 2007, not that it is from there, who knows?

3 Likes
I am not sure why the pictures of the pavilion are showing a dark ring around the edges. Could just be how the light is reflecting internally, however, I have seen a similar affect on stones that are doublets. Can you use a light and shine through the side of the stone through the girdle? If there is a distinctive band of light coming through the girdle, it could be a doublet. Not saying that is the case but, just seems odd.
A quick test would be to view the stone under immersion.
Secondly, there seems to be a reflection or gray colored band in the lower left of the stone image of the table. I wonder if that is just a reflection from the tweezers?
Cheers!
2 Likes
Thanks @TroyJ49412 !
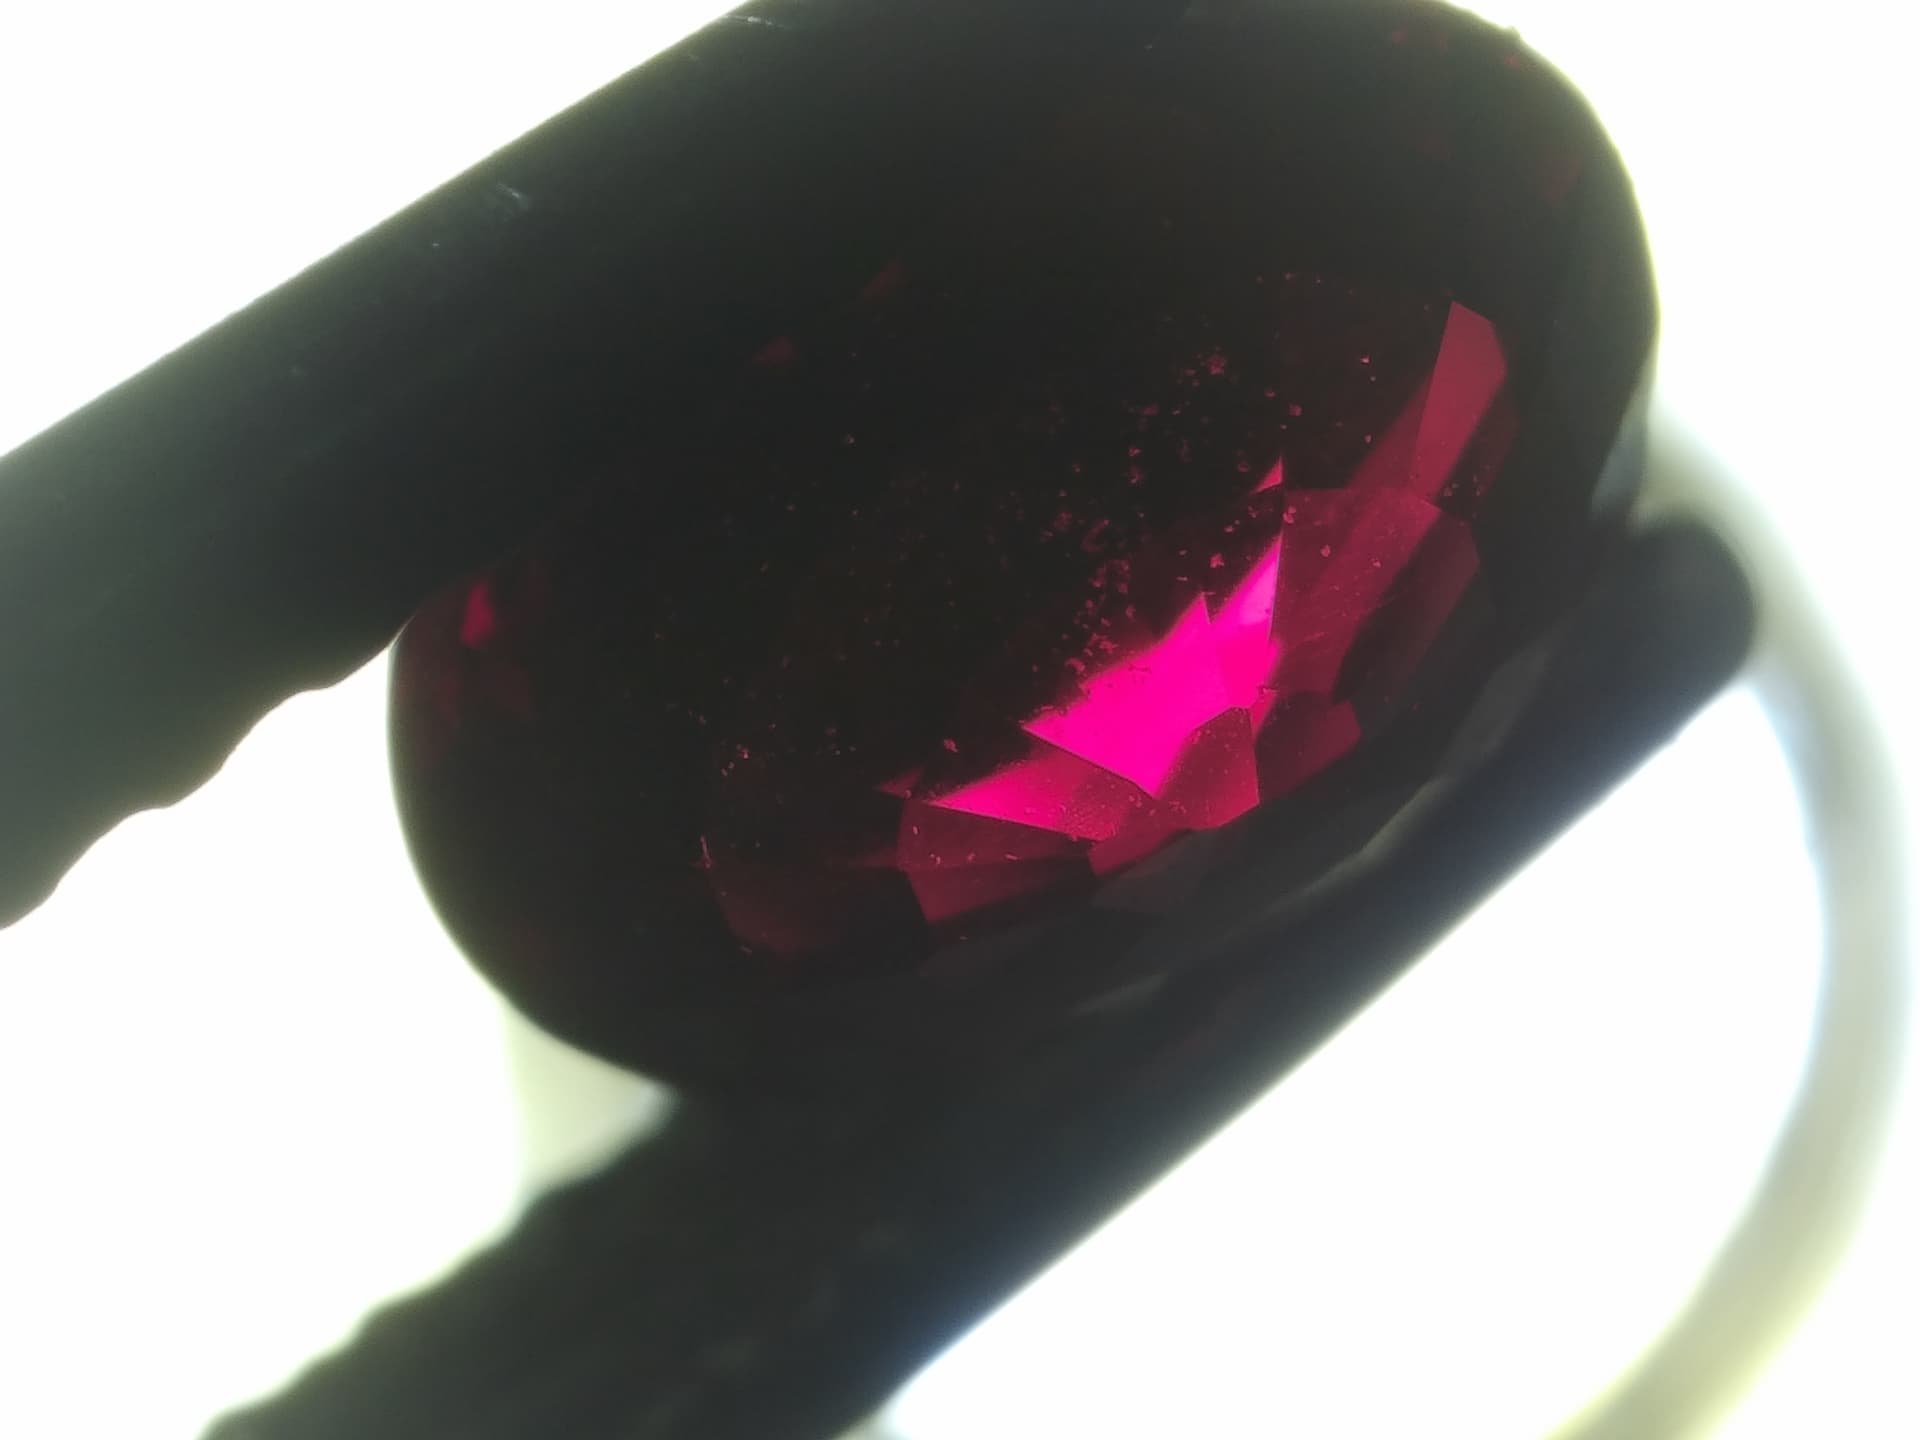
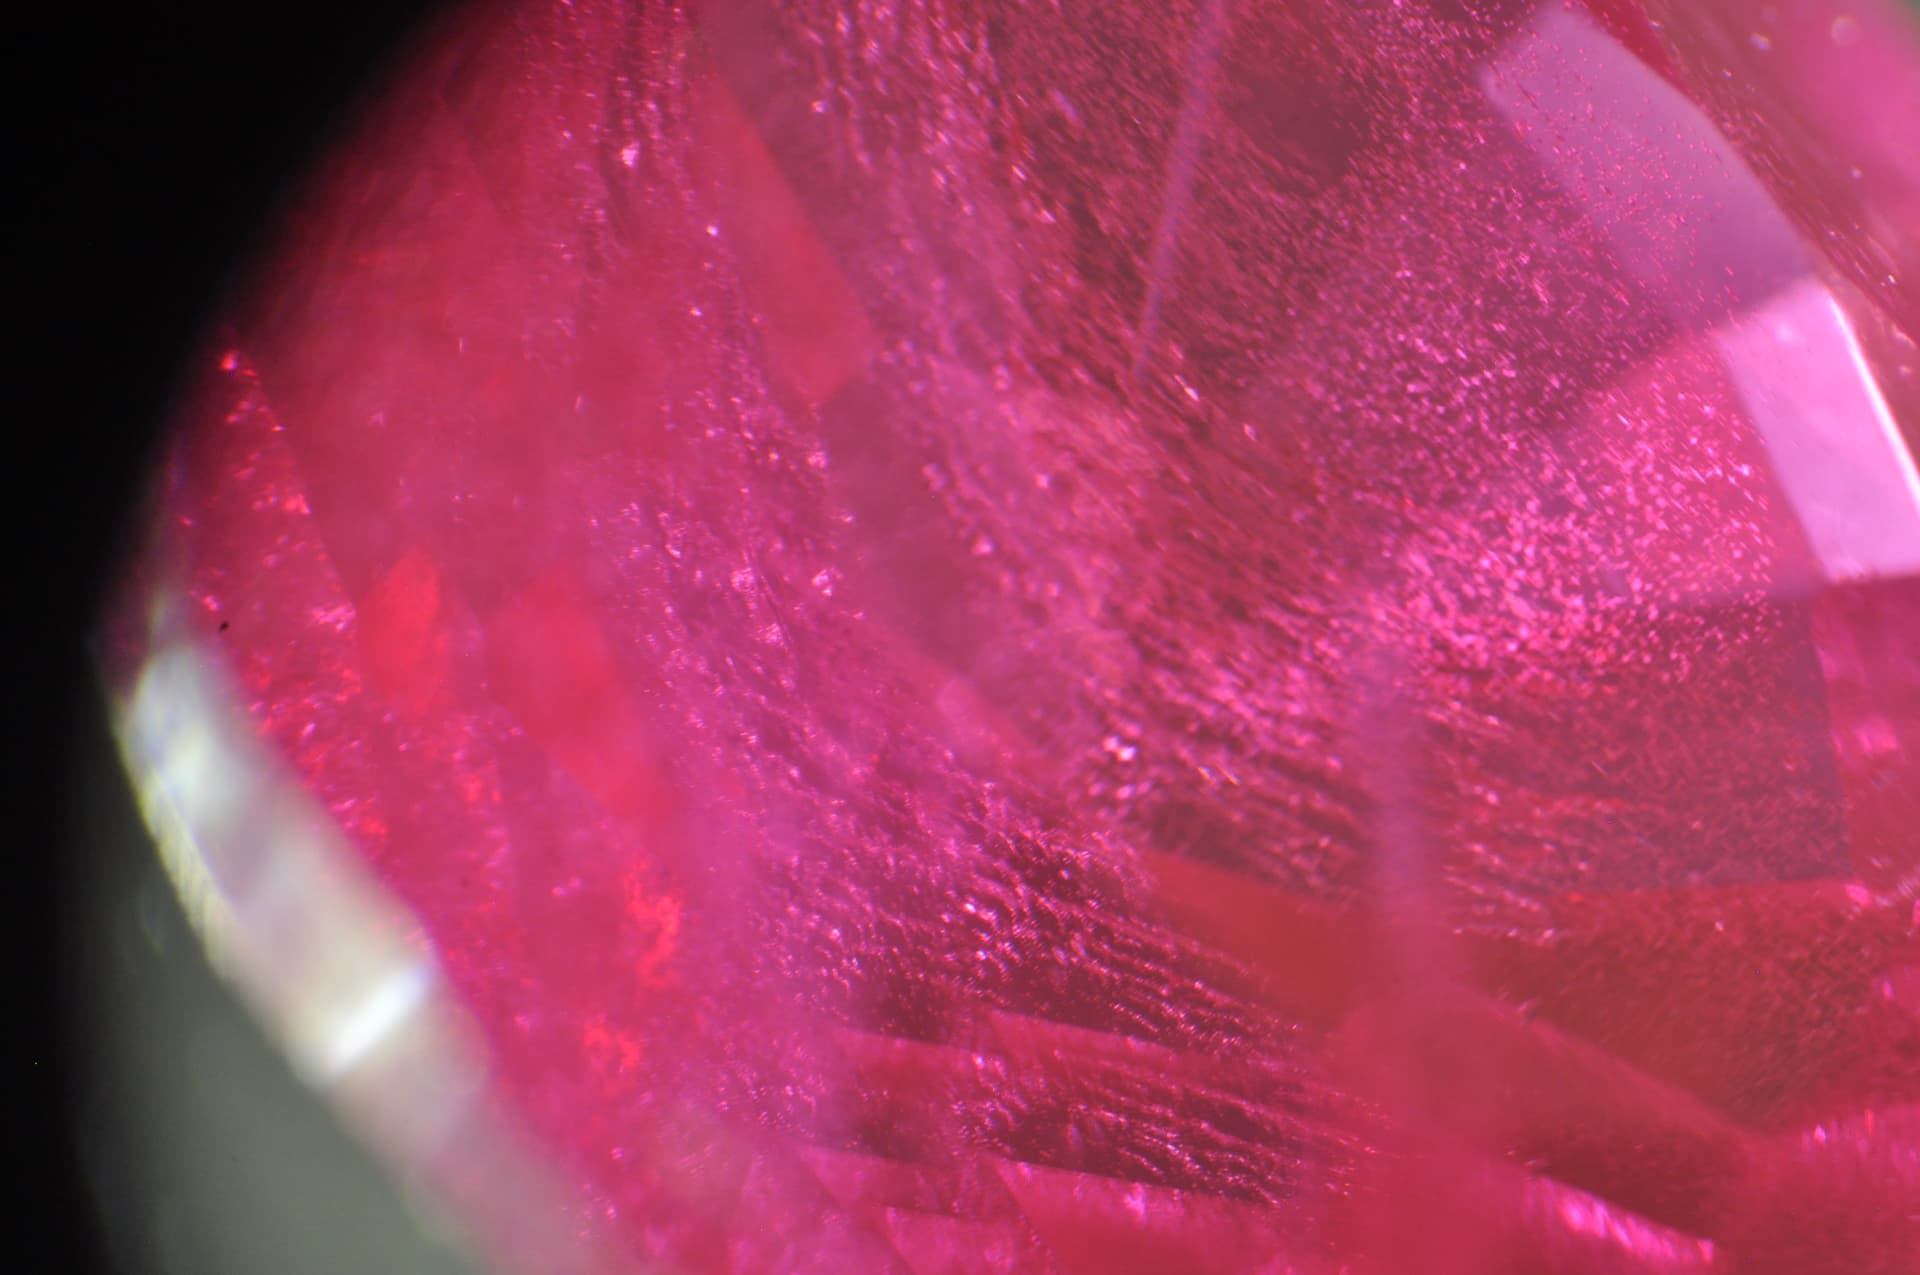
I have a lab microscope but cannot take pictures with it yet as I’m getting the Nikon F mount adapter and C mount is on order. This is just another angle with fair magnification from the bottom. The area where you see the dark bands is a sea of bubbles and a feather inclusion? not too sure. Once the microscope is set up to take images I hope to have a lot more to look at !!
4 Likes
Hey Stuart, here are some great links that can help you determine if you have a natural/treated or synthetic ruby.
AIGS Thailand /Inclusions
Lotus Gemology Inclusion Database
GRS Inclusion Gallery
3 Likes
They are all fantastic resources with great imagery @JCBellGG - Thank you so much.
1 Like
Those are excellent links, @JCBellGG! Thank you!
1 Like
Hi Stuart,
Thanks for the different image angle! That helps with illuminating the whole stone. Can see the veil inclusions you mentioned. It seems they are running axially (running towards the pavilion / table) and not planar or in parallel with the table / girdle planes.
It still would be a good test to look at the stone immersed. Might provide good details on the color bands and inclusions.
Really good image!
1 Like
Veiled inclusions beautiful picture well taken and the last comment was spot on.
I am also a writer of science fiction and will find a way to incorporate your anti-matter (lol) into a future book. A highly magnetic gemstone that contains Anti-matter - What fun (a portable containment unit)!
Have a great day
2 Likes
I have a theory why this is the case (the dark ring) but it’s just a guess. I have a bunch of examples that exhibit the same dark rings, all of which are from stones worked in ancient times. I am not suggesting these were worked long ago, but it seems to be a characteristic of many ancient cut stones. Here’s an example.

2 Likes
Cool stone and images. I think it has to do (for my images) more about the orientation and lighting or lack of good lighting and my setup.
1 Like
Hilarious Joel. My brother in law Michael is a serious designer (archtecture/interior) and has been writing passionatley for years and is a vice chair for curriculum at McGill University. There’s so much more to it but I’ve learned a lot from helping him create a few websites. Now we have “Flash Fiction” who knew? So many hacks in life, so why not in writing too. Of course. You can see/read a bit here if you get bored - https://writingmatters.online
1 Like
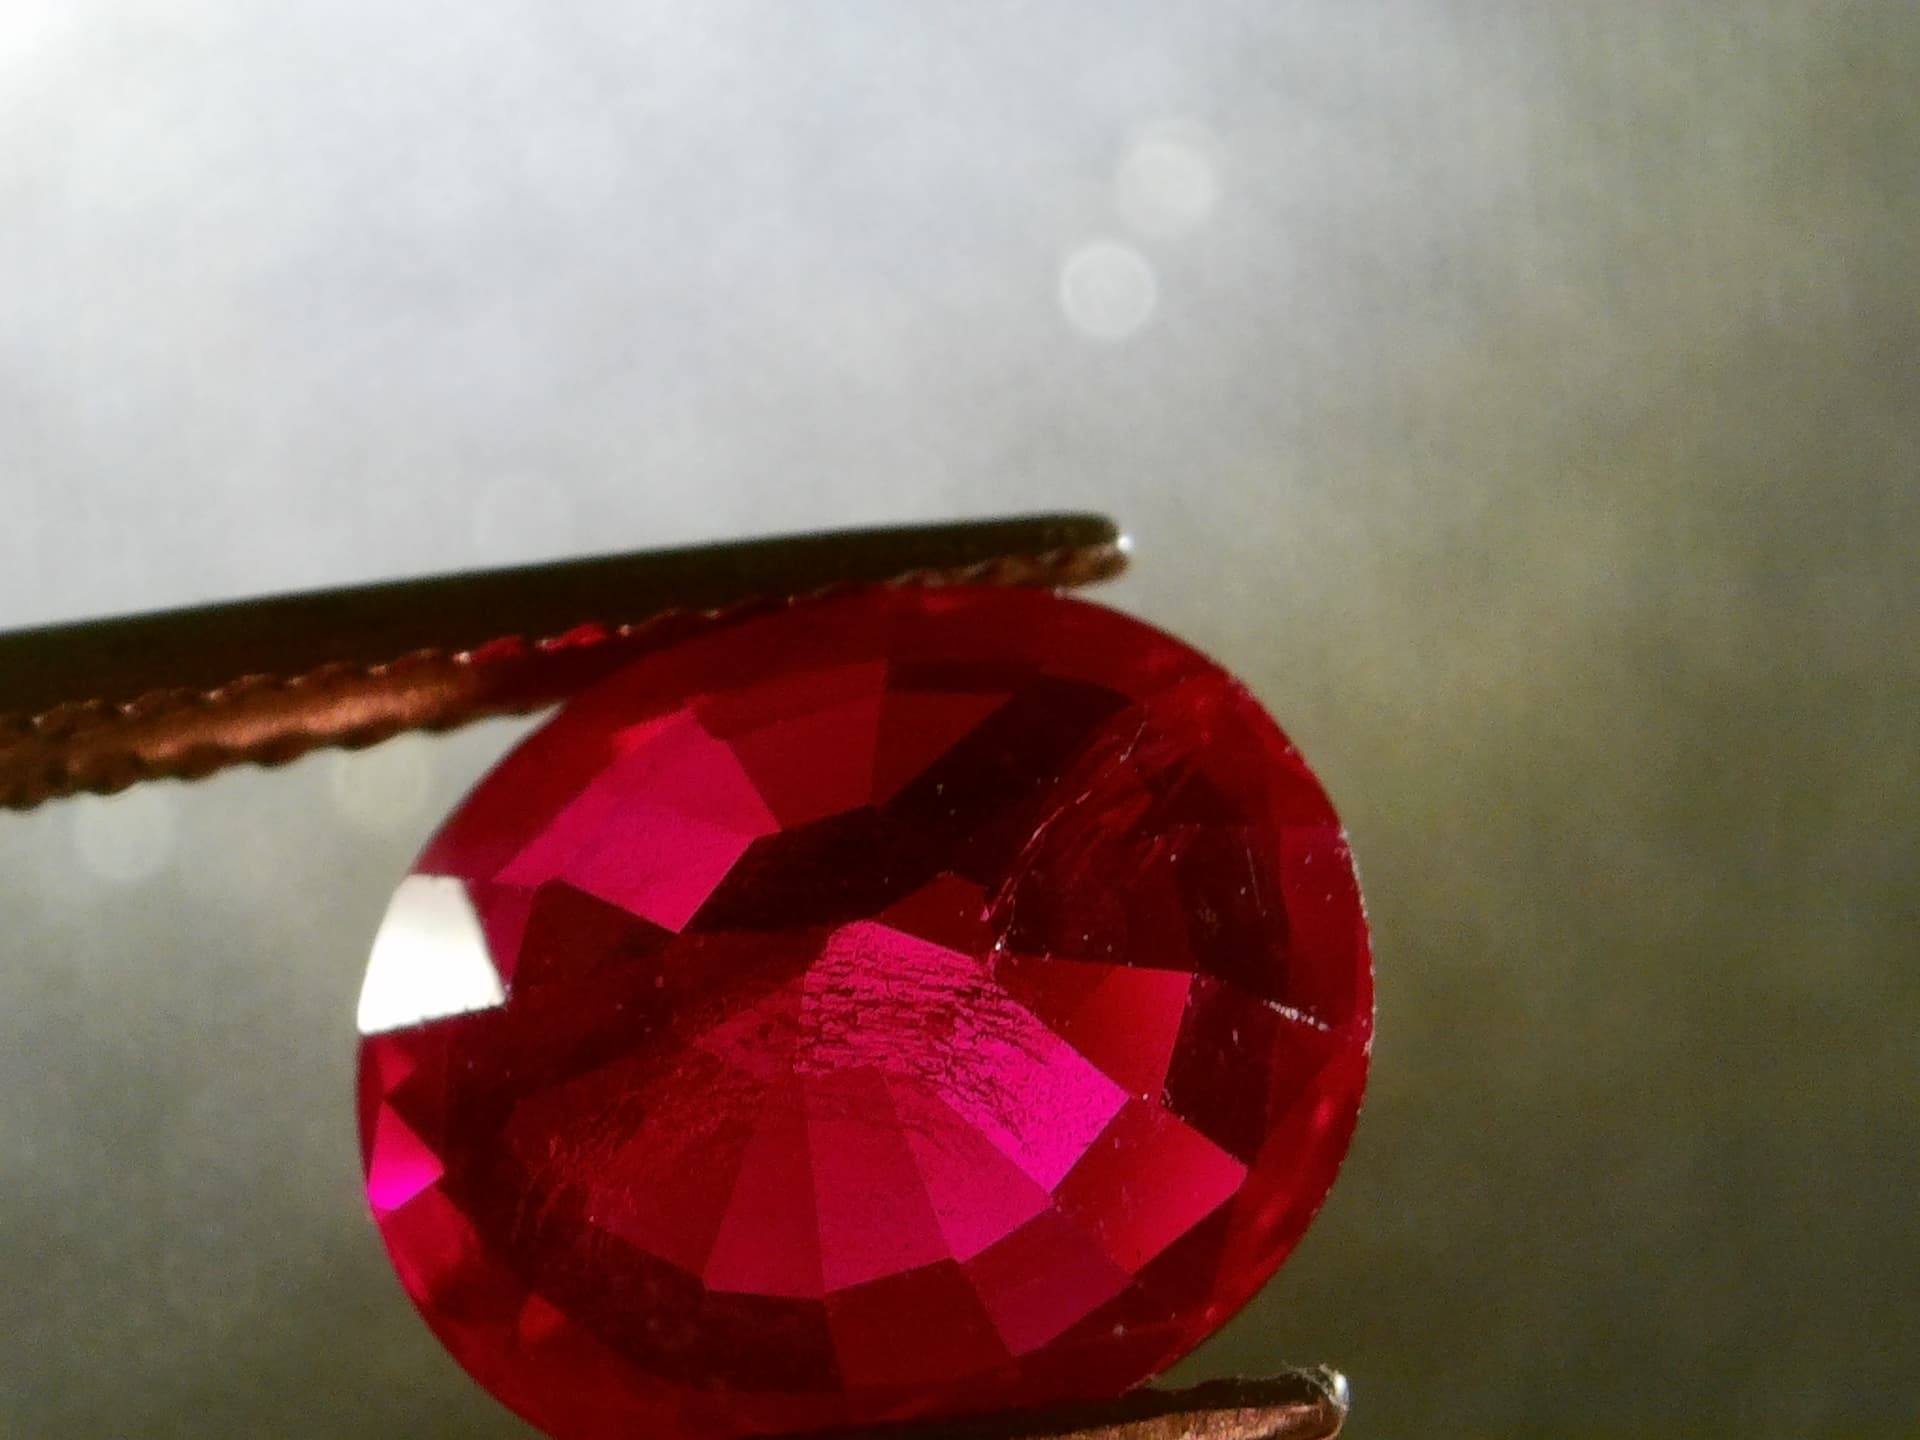
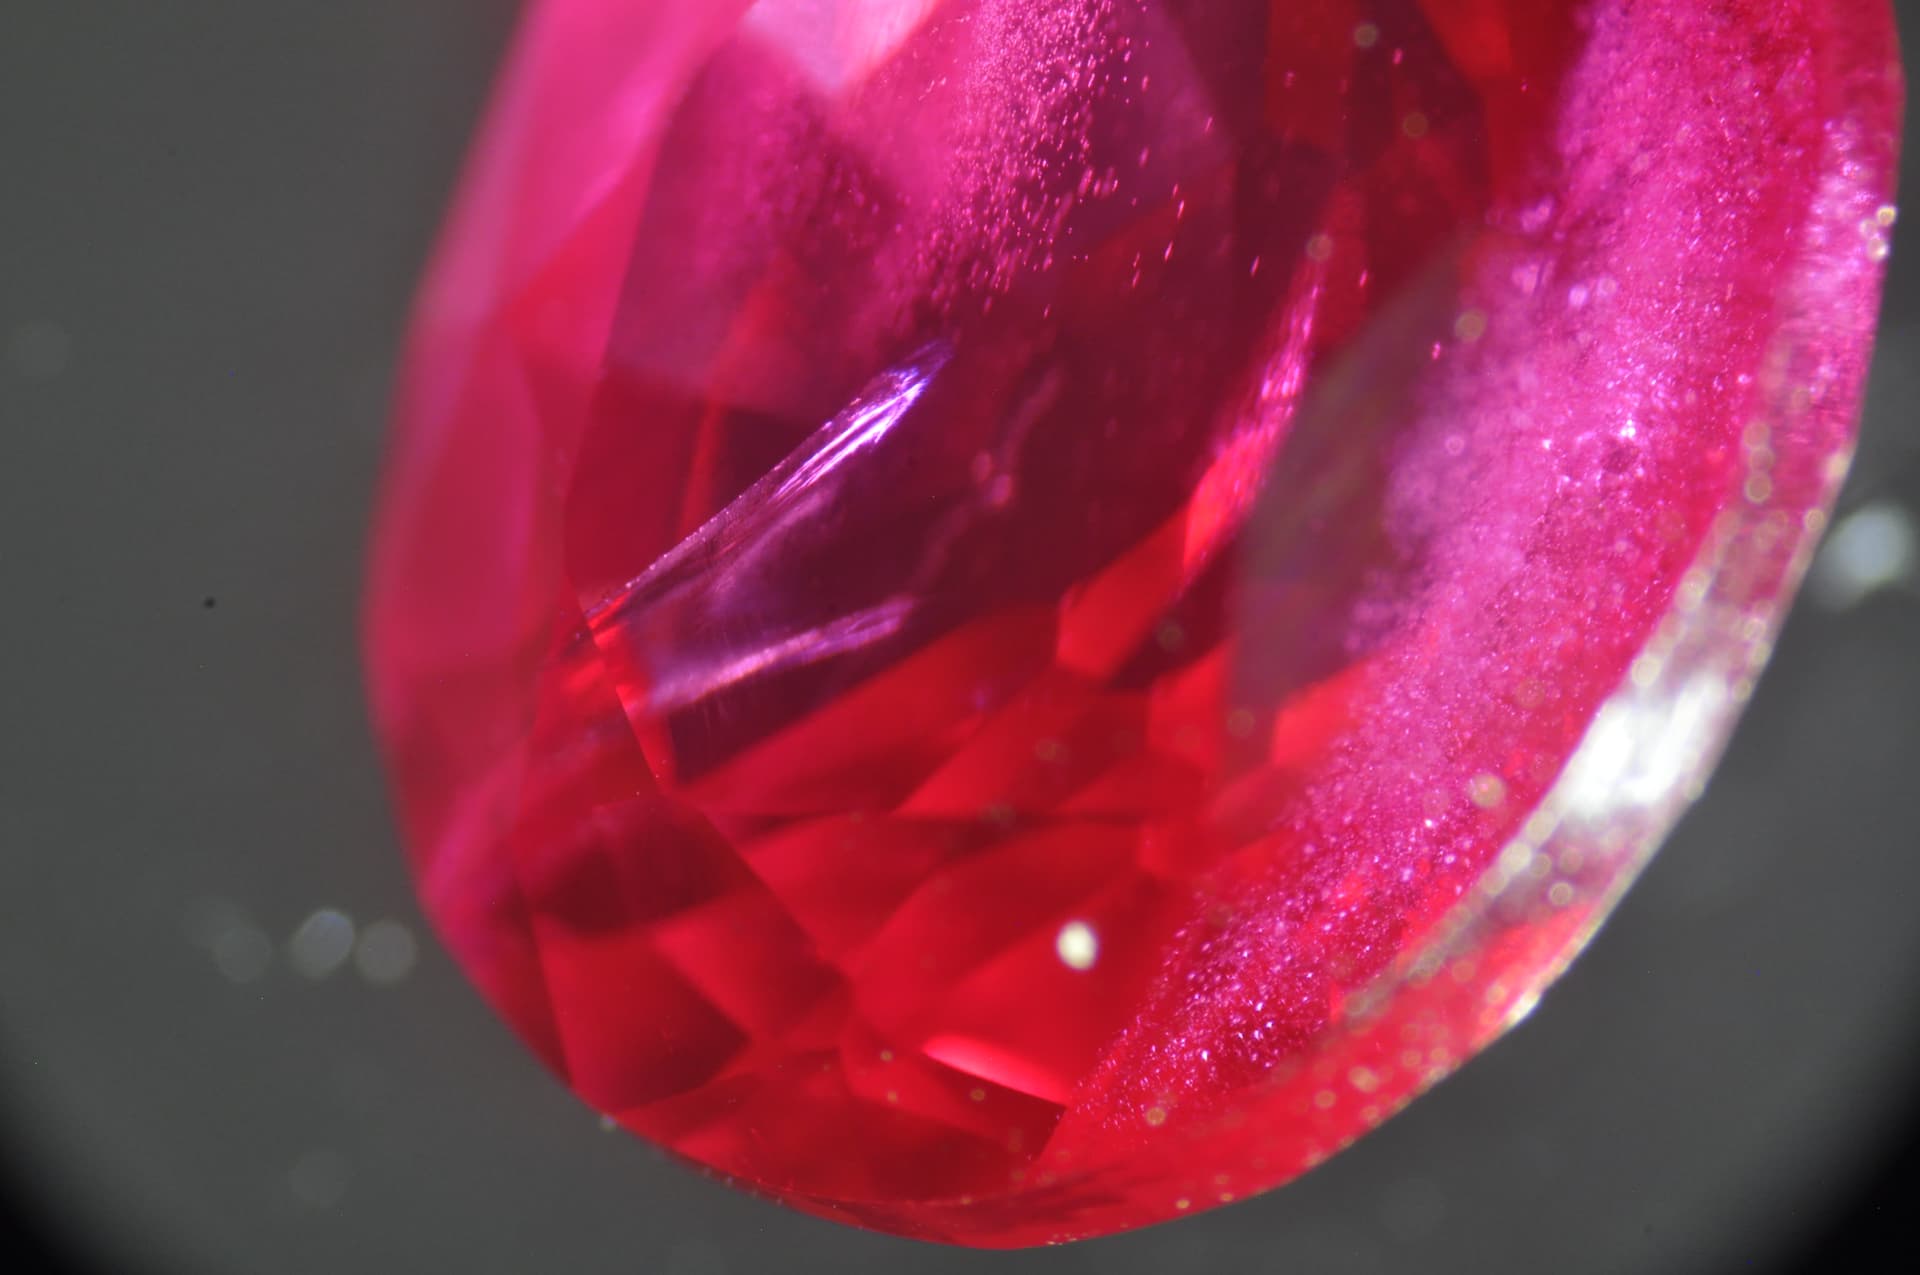
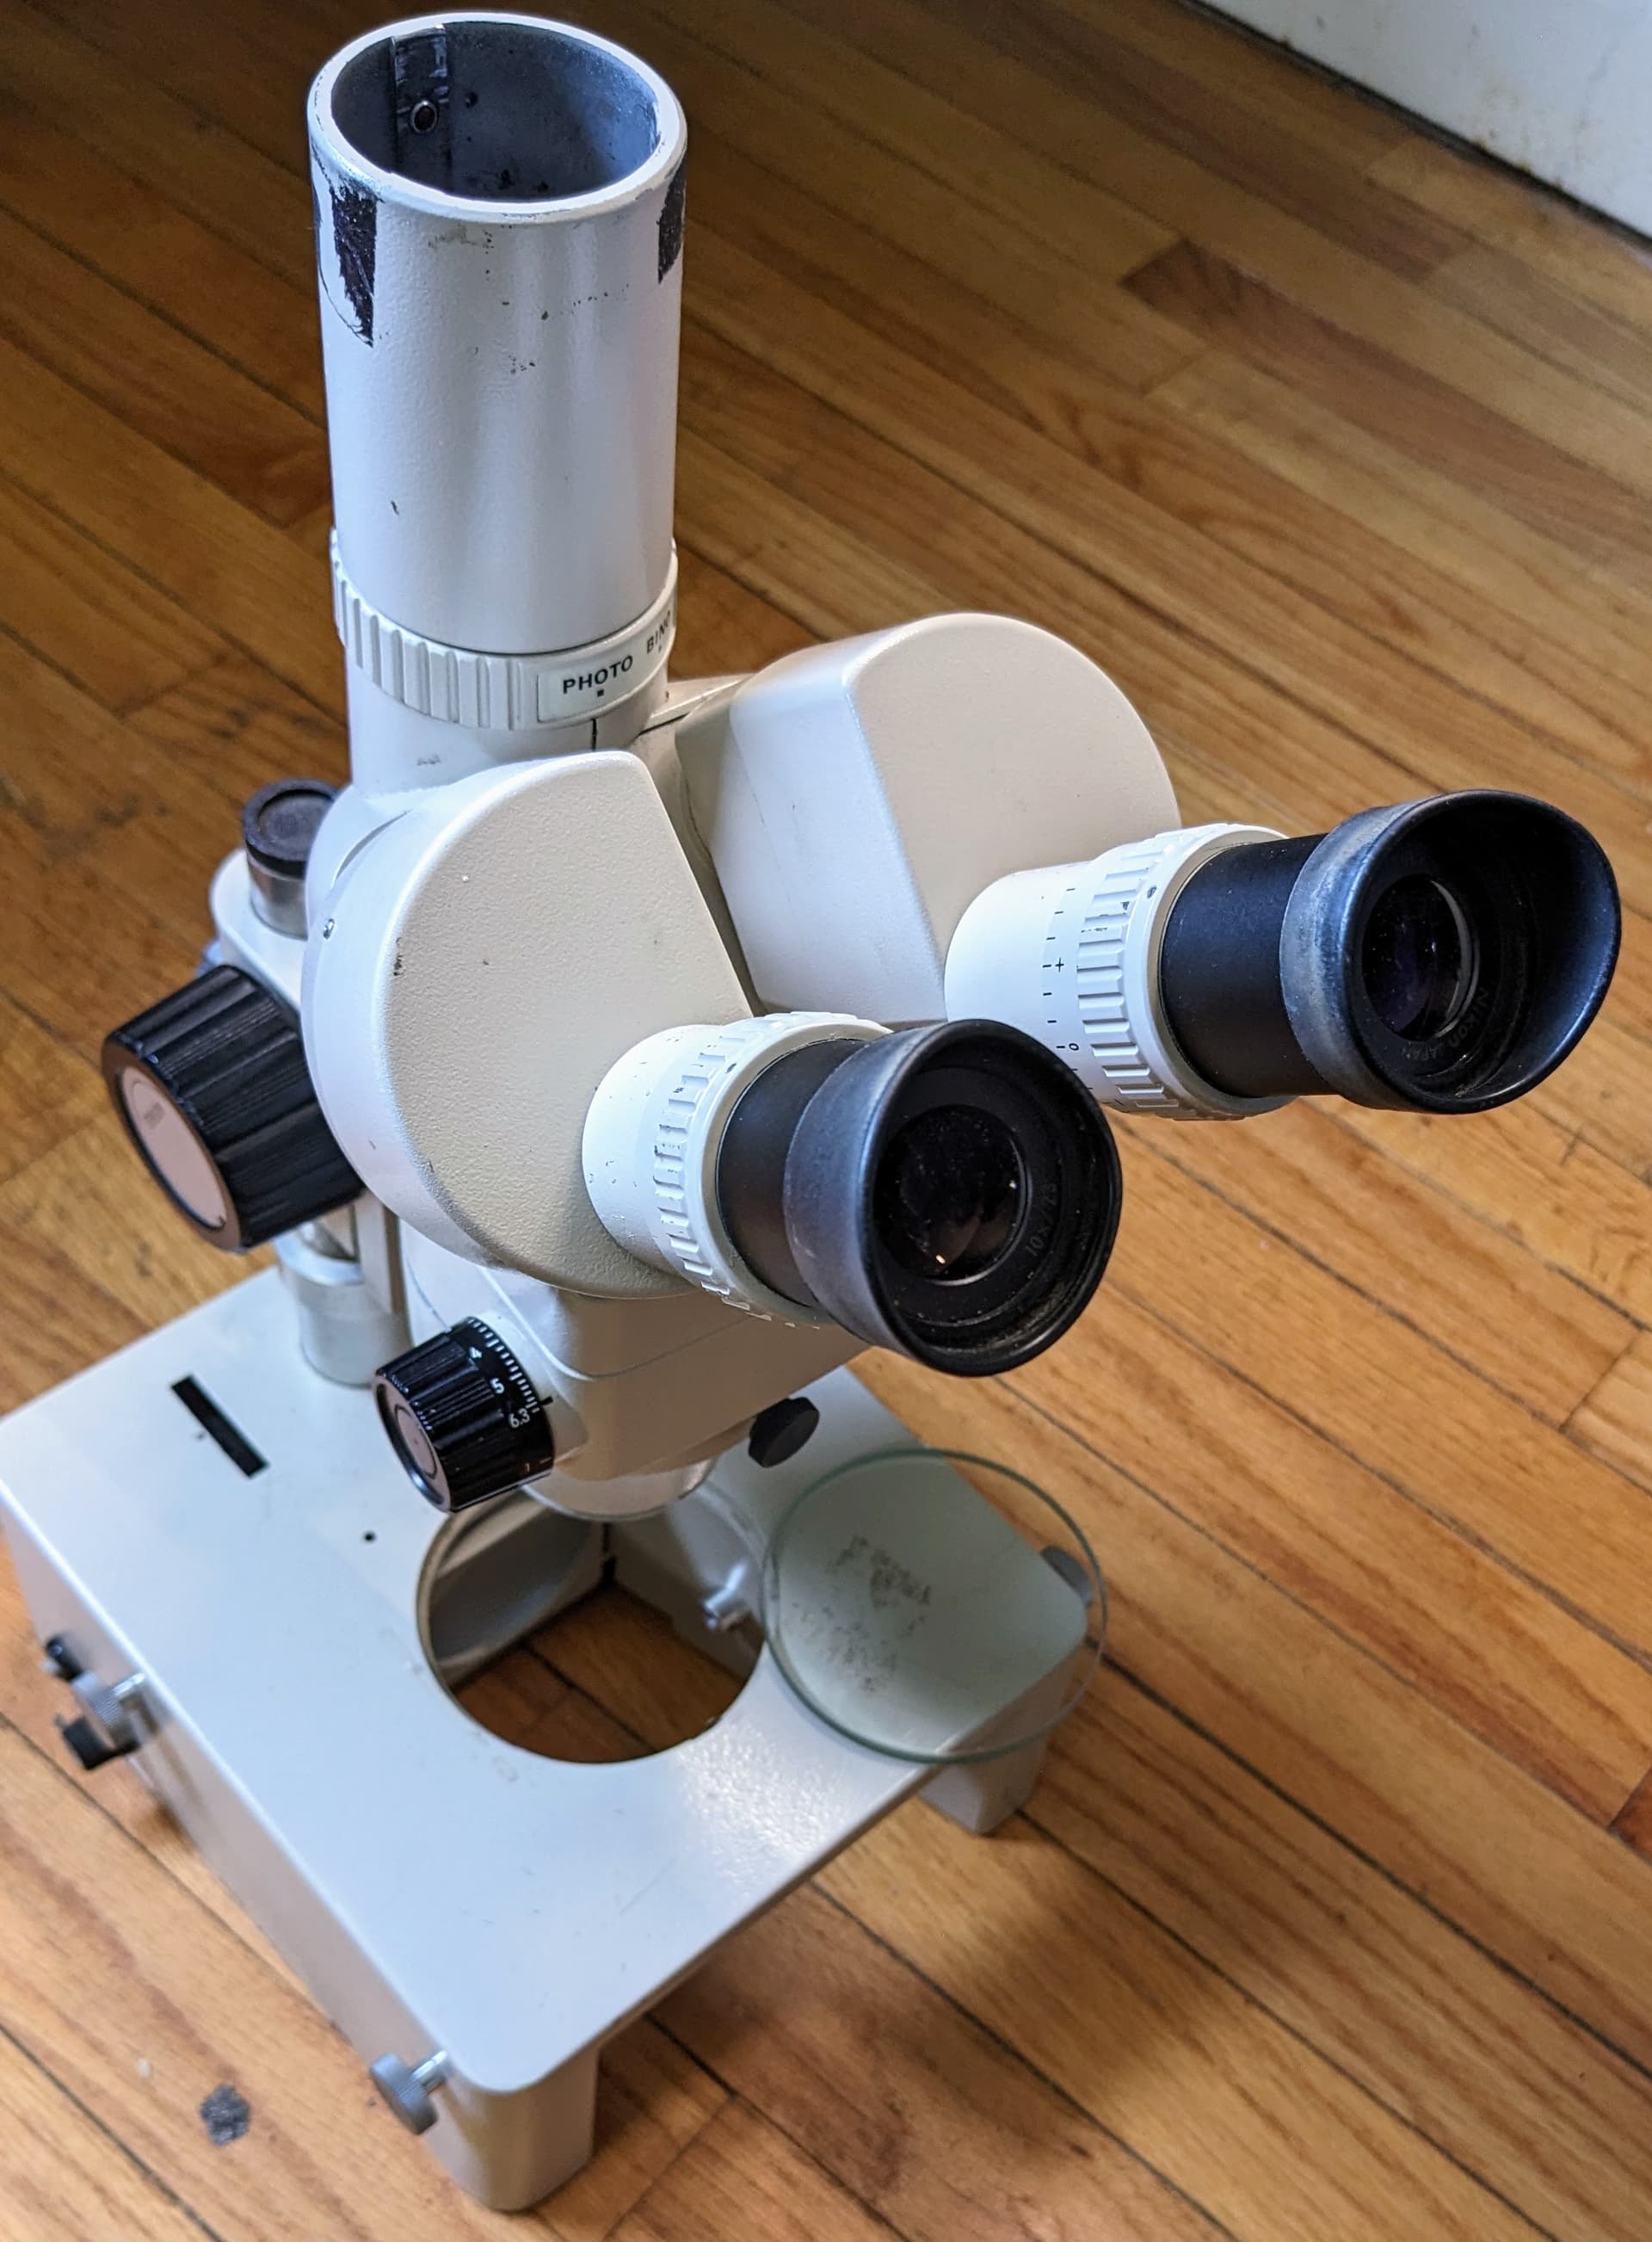
I chatted with a microscope technician for an hour today to see if I can get my used vintage Nikon SMZ-2T whipped into shape for “PhotoMicrography” The big deal is the “stage”, how to hold the gem, lighting and the “Trinocular” imaging tube to adapt a DSLR to. I will keep this updated because the people at IGS and our discussion stimulate me to do better. Enclosing 2 never before seen photos. These are hacked using the microscope and my older D-5000 DSLR. Once I get the entire setup done, watch out world !!!
3 Likes
On one of my first microscope purchases, many moons ago… the adapter tube on the trinocular was nice and silvery shiny… both inside and out. There were these half-moon sliver-like shadows and light glints, in the images I took.
I ended up using black matte spray paint to get rid of the internal reflections, which helped immensely.
Now there are these “ultra-black” paints on the market that are really effective, but they may not be very economical / affordable for a single project.
Another option would be some focking material for the internal tube surface.
The only problem I can see with using felt, is it may shed fibers if disturbed… so you may have to dust off the internal optics occasionally.
Cheers!
1 Like
You can also get some black paper (8 1/2 x 11), roll and cut to fit the tube. Felt does have a tendency to “lint” after a while.
The small hole in stage is there so you can add a set of gem tweezers (definitely not the correct terminology) I use one on my microscope to hold gems above the stage to photograph using full light, black field, and diffused light. It allows you to turn the stone while keeping it at the same distance from the lenses.
2 Likes
Absolutely update as this progresses, please. The pics are amazing and I’m anxious to see how this goes.
1 Like
Knowing any Ruby hobbyist can afford will have inclusions, identifying them is key. Dawn Morning, a seller on WhatNot has been extremely helpful in teaching what she’s learning as she studies to become GIA certified. Seeing the equipment she has and how she uses it I’ve learned so much. Also identifying the origin of the stone seems key. She has very picky customers, even on stone under a carat, and examining them to identify inclusions and and rubies and their multiple personalities and types for valuation is easy to follow and she does explain and share her educational training. Seeing the set up she has to complete her education while financing it buy selling gemstones at exceptionally reasonable prices.
Most of my rubies were purchased over 20 years ago from a gemstone cutter in Thailand. I bought many other stones as well to self educate. None were heated or filled. They are generally high quality and I believe high quality but now I’m in the process of clarifying my thoughts and proving them. They came both video details and description by cutters and location of mines. I became friends with the owner. So I have a few hundred various stones to now process since I have time now.
If you do buy any from Dawn Morning on WhatNot they come with video of the review of your purchased stone (or you can watch the entire stream again) to watch her techniques learned. I think the mini courses offered on IGA are also excellent training sources. Often an iPhone (best photography quality you can afford) set up on a tripod set on a table between your legs gives you both still and video options to obtain very close detail. Using a remote shutter feature will not disturb your shot/focus when inclusions are apparent. Hopefully it’s an inexpensive option to get the shots you need with a phone generally available to buy interest free over 24 months and useful for other purposes. Mine has 130,000 pictures and plenty of storage left. It also keeps the equipment to learn down. Dawn also includes info on stones purchased and they are sent with in stone ‘jars’ for convenient storage. Prices $5 up! I just bought a 10 ct Lab with Portuguese cut and extraordinary flash for $25! 2 almost incredibly clean matched emeralds tcw 1ct matched set for $70. I watching the entire time. Size was measured. Tremendous value and perfect for emerald earrings. Also she found a great pendant match in same quality and color. She take the time and I’m learning techniques. For me, I’m getting a free education on how, equipment and purpose of using that I can see used on stones I purchase. As she continues her education I only learn more. Plus I can supplement with IGA mini courses! Win win!