Hello! Im extremely new to the world of gemstones but I’m trying to teach myself how to identify inclusions. Im having a really difficult time being able to tell whether the lines im looking at under the microscope are growth lines or if they’re just from polishing the surface.
Are any of these images displaying growth lines?
Any and all tips on how to spot growth lines would also be greatly appreciated!
p.s. these images were taken by a x60 digital microscope from various rubies and sapphires in my collection.
2 Likes
Hi Sam,
Welcome to the community! The digital microscope you have takes some very good images!
If you haven’t seen this article; this is a really good source on how to approach viewing a stone using a microscope. The Microscope: A Guide for Gemologists - International Gem Society
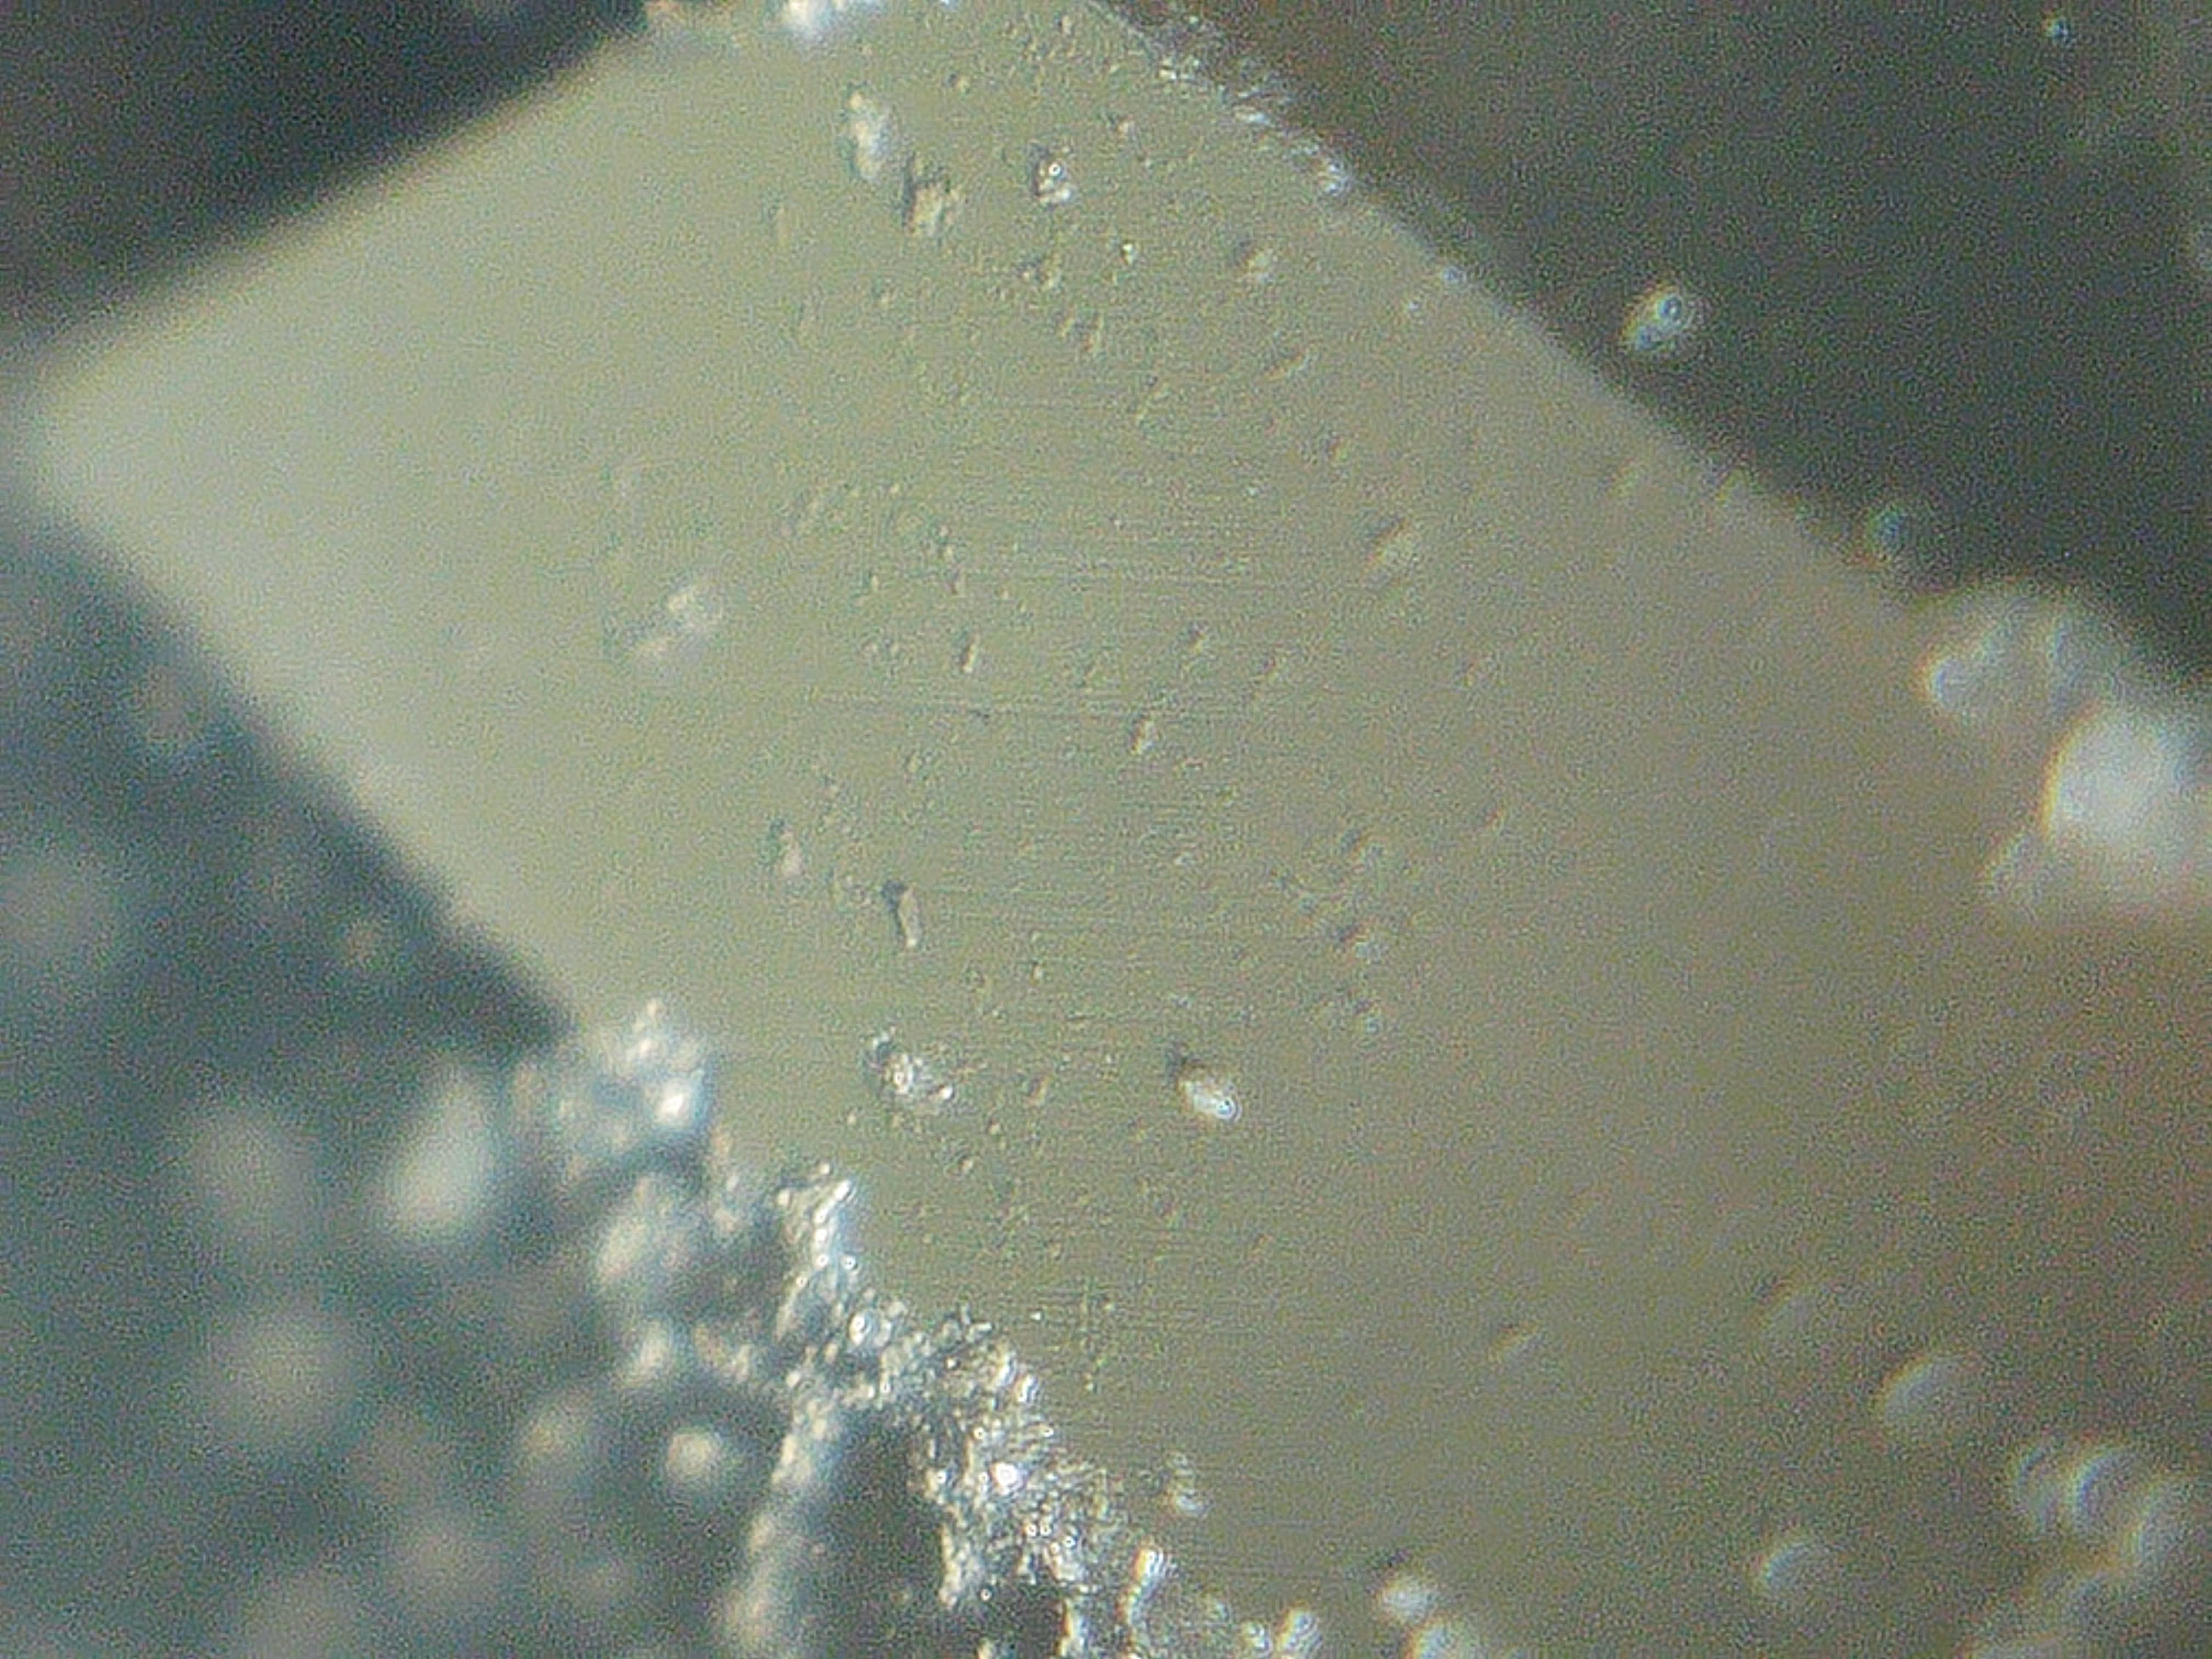
The first two images seem to be viewing the internal structure (inclusions).
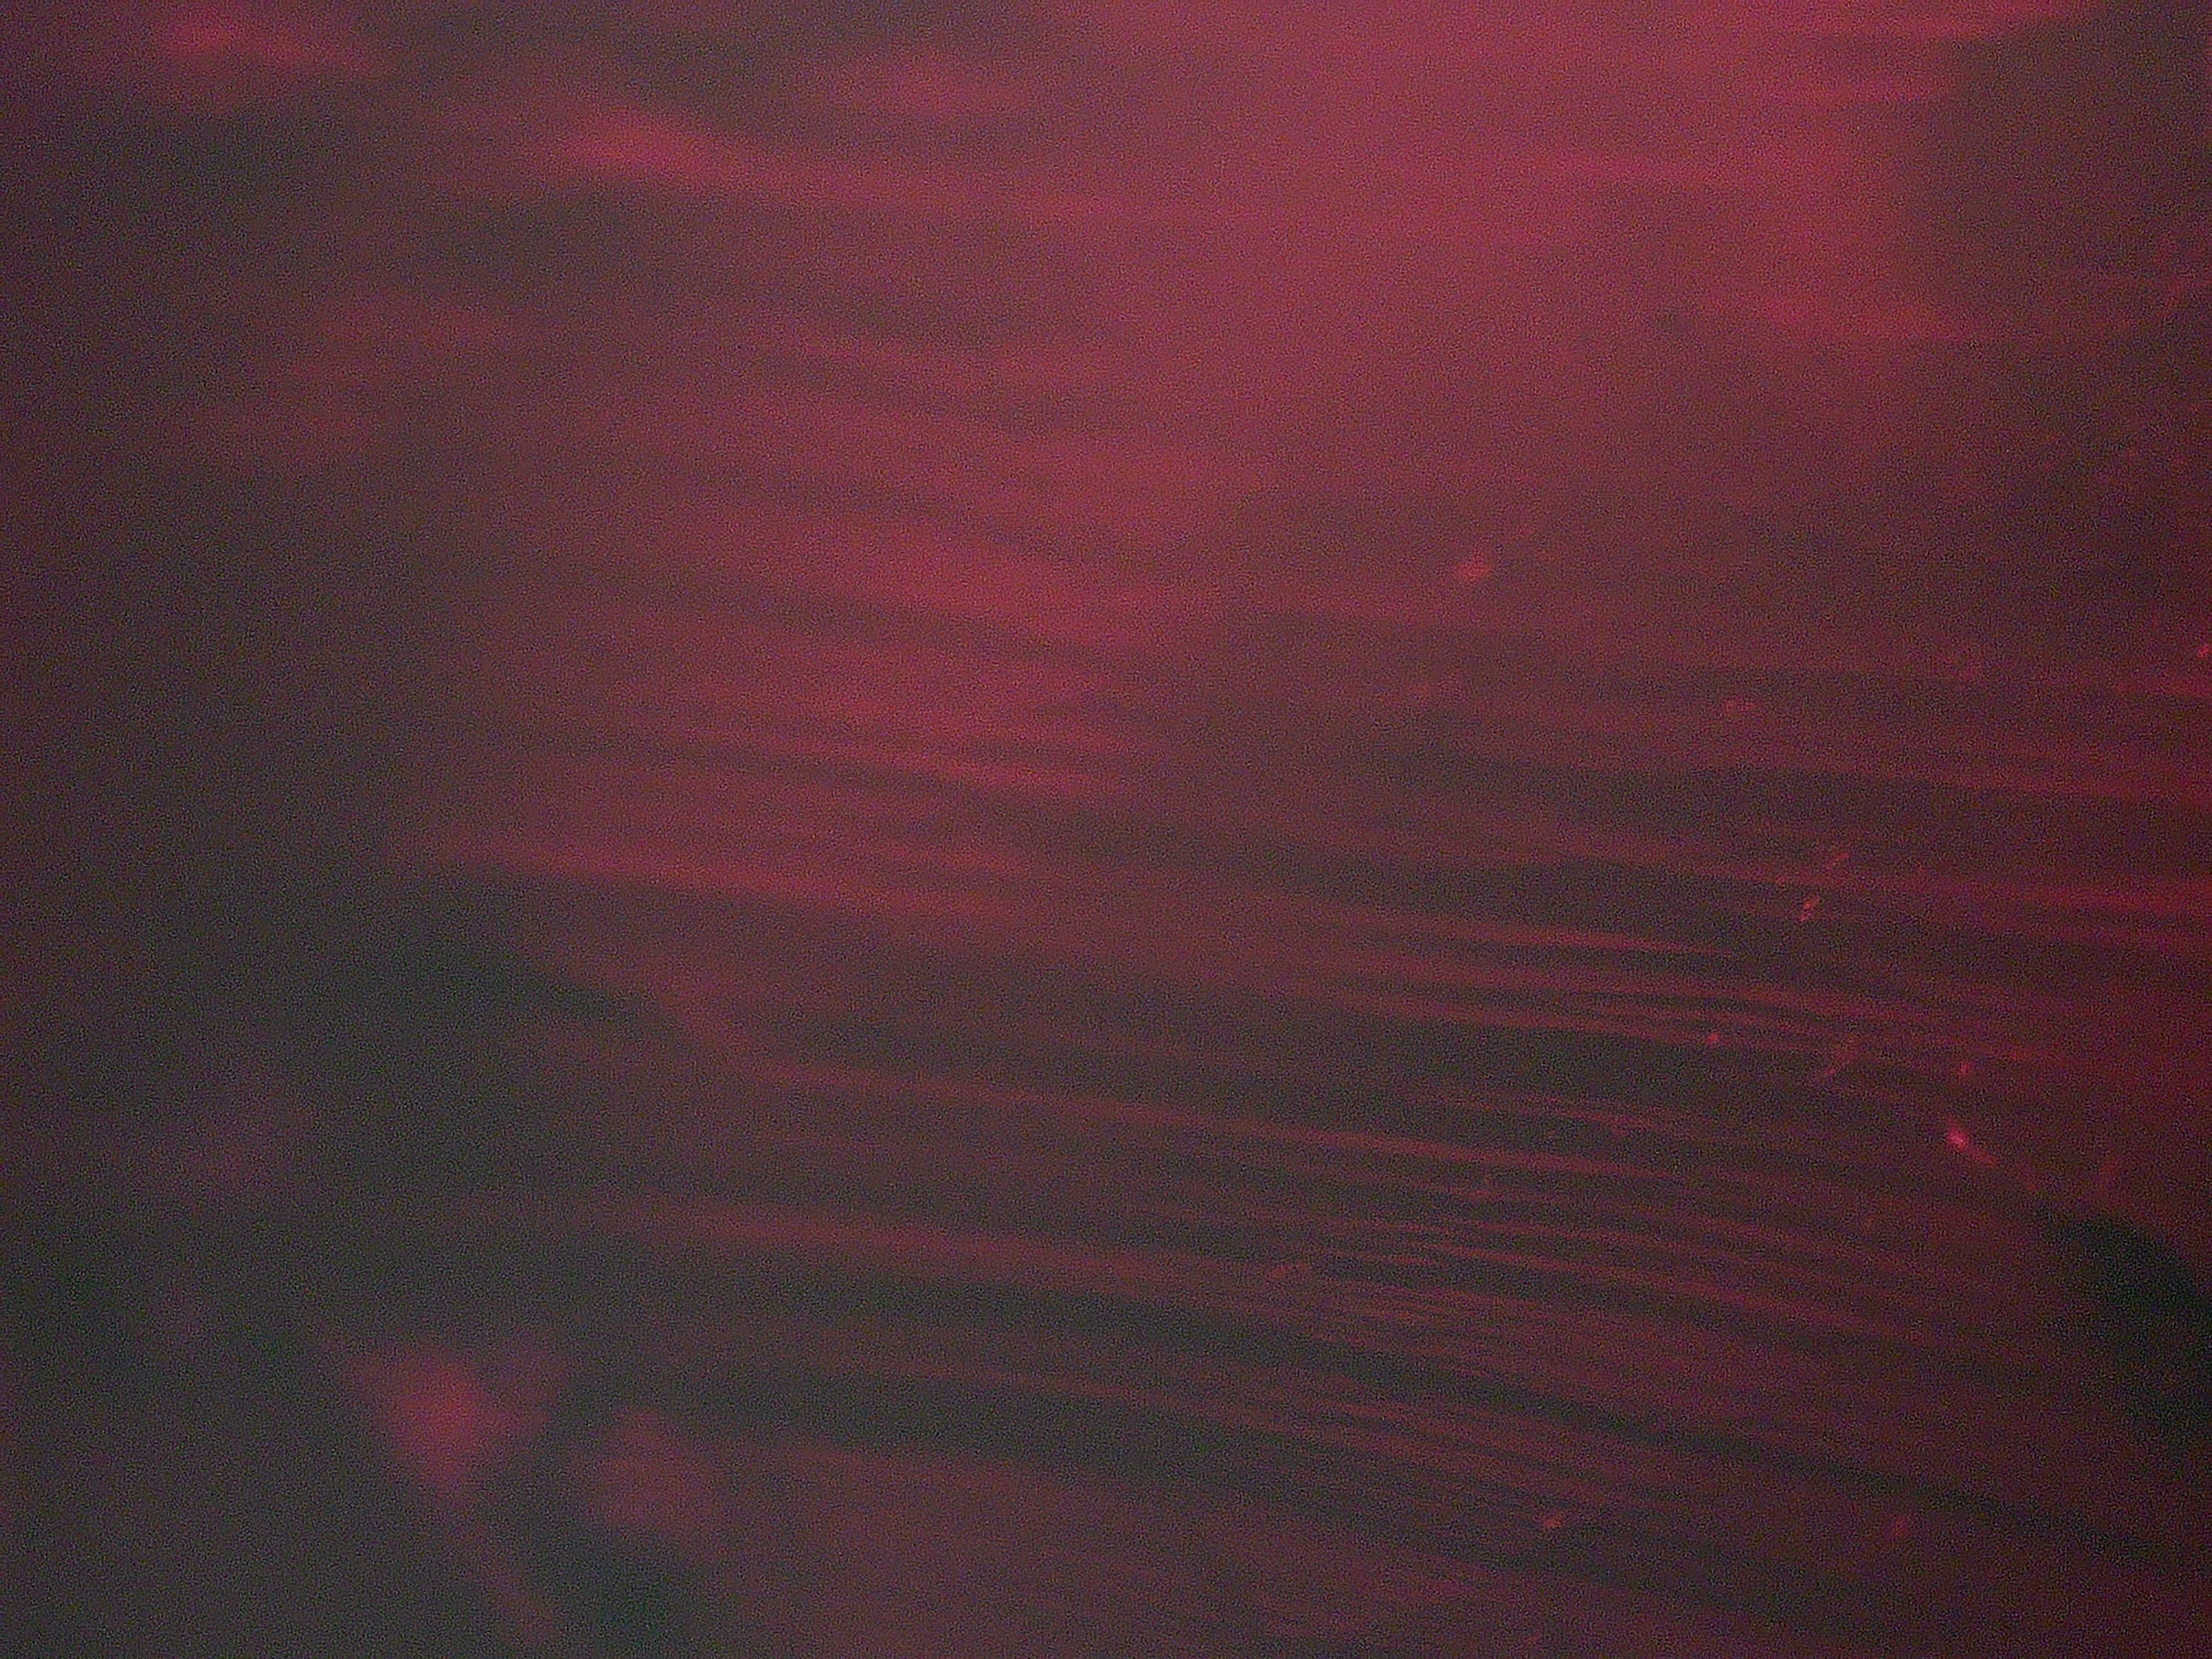
The third one really does seem like a view of growth patterns. However, without viewing the external of the stone first, it might be difficult to distinguish between surface polish and growth patterns internally.
A good way to view surface features is to use an external light source and angle the stone so you see the light reflected back at you. (As illustrated in the article above) You may have to use a low illumination level, so you don’t blind the camera and wash out any features. Surface polish and scratches will become very visible as you rotate the stone around.
When viewing stones, I will draw a sketch of the table and crown facets. Then take note of any features that can be seen using a loupe or mag-visor. I then place the stone under the microscope and start looking at these. Taking notes on each one.
The last image you posted (red stone with straight lines) looks like surface features at adjoining facet edges. That is a really good image!
Cheers!
Troy
5 Likes
@SamR31352 if you dont mind my asking. What microscope do you have?
Thanks.
1 Like
Thank you for the insight Troy! and for the article, it was very helpful. At a closer glance now with a loupe I was able to better see which ones are surface inclusions and which ones are growth lines!
1 Like
its an Andonstar AD246S-M digital microscope which I bought some time go on Amazon for around $130. What I really like about it is that the pod is detachable/adjustable so that it can also be combined with my polariscope for better viewing of smaller gems.
Hi Sam,
Congrats on using magnification to suss out clues to natural vs synthetic. Short of expensive instruments, it is sometimes the only way! If you’re at the mines or nearby with only a loupe it is also the only way! Did the broker or somebody throw a cleverly massaged syn sapphire into the parcel? Did somebody throw a piece of pink glass into that parcel of morganite (this actually happened to me…and I failed to look closely!)?
While not an expert with the loupe or microscope, let me add to and agree with what Troy said. If you rotate the stone as you are looking, you can often see whether the lines are on the surface or internal. And, yes, as he said, changing the light so that it glances off of facets can show that polishing lines are on the surface, like in your last pic, where they stop at a facet boundary. Growth lines never do that, right…just stop at a cliff? Growth lines in syn sapphire are usually curved, so there’s that along with their three dimensional quality. Also, the wavy, slightly curved nature of the lines in the third pic are telltale of synthetic, I think. There are growth lines in syn corundum and wavy swirl lines in glass.
Two other things you might consider. One is to use less magnification for starters, as inclusions may look different at low mag, like 10 to 20X and be identifiable there without cranking all the way up. If you don’t see something you know is natural, then you can go higher. A second idea is to use immersion fluid. Something like refractol or benzyl benzoate is cheap and relatively non-toxic and will let the polish lines and surface features disappear, while the internal features are on display and seen to move in space as you rotate the stone. Just hold it in tweezers in a small beaker of fluid. If you’re not using a lot of magnification, it helps to use a container which has a clear bottom without lettering, etc. I have a plastic two ounce measuring cup from Wal-Mart I’m going to try out!
Hope this helps and thanks for the info on the microscope. Might get one of these to supplement the venerable, retro Gem-O-Lite I have! -royjohn
2 Likes
Thank you for the link to the article, Troy. However, there is no mention of having a polarizer filter for microscopes. I have read from some reddit sites that having a polarizer for a digital microscope is useful, and I am wondering if getting a digital microscope with a polarizer is a good idea. I am totally new to gemology and any guidance is appreciated. 
Tomlov dm501 hdmi digital mikroskop mit polarisator 10.
Hi Ian,
Welcome to the community! Yes, a polarizer lens/plate for any microscope is definitely useful for Gemology. If one is offered with a microscope, it makes sense to get it at same time. Easier then having to hunt for one that will fit, later.
The Tomlov DM501 you are looking at is a bit misleading! The polarizer portion is actually part of the 10" LCD screen to improve the sharpness and color definition of the projected image. It is not part of the optical path.
Unfortunately, the polarizing plate/lens needs to be in front of the camera aperture or the light source to benefit your observations.
The DM501 is probably a decent digital microscope, it just won’t have a polarizer feature.
1 Like
Thanks, Troy. I still have a day job, so am able to come to this site to learn when I have then time.
Noted on your advise on the polarizing lens. I didn’t realize that the Tomlov DM501 has a polarizer on the screen. (How is that even possible?). I will keep a look out for another one with a polarizer as an attachment. Thanks so much for your advice, Troy! Much appreciated!
HI Ian,
No problem! The day job is necessary to pay bills, buy groceries, and fun things. They unfortunately take away precious time from doing the fun things. Still riding that roller-coaster here. 
A pre-manufactured polarizing plate/filter is convenient and aesthetic, but not necessary as you can easily construct one with some cheap materials from Amazon or other vendors.
All modern displays/monitors/TV’s have built-in polarizing layers necessary for each tri-pixel (Red/Green/Blue). The most basic way to explain the design is how the back-light panel of the monitor emits light through the liquid crystal layer using two polarizing planes. When the liquid crystal is polarized (energized) in a certain direction they allow light to pass through or block it.
A more technical explanation:
Cheers!
1 Like
I’m a newer Gemologist and appraiser. Let me tell you it isn’t easy to identify lab vs natural. Refractive index is helpful. In lab created they tend to be heavier in the mineral like iron, they may read higher or have a fluorescent reaction. My advice is to store as many pictures with notes on what it is. Get some good reference books and study up. Have fun too!
1 Like
If you are going to get a polarizing attachment, get a good one. Optical calclite Nichols prisms if available for your microscope are much better than plastic sheet polarizers that block only half of the non polarized light from seeping through, with bright illumination. The former blocks nearly all. The downside is that the aperture is smaller by two stops.
Optical tomography allows the user to look into a stone at different depths…confocal and optical tomographi microscopes are cost prohibitive… however, one can use a rechargeable battery medical hand held opthamoscope to approximate the same by changing the focal lenght by flipping thru a series of lenses that go from -40 to +40 diopters… the same way that eye doctors look into your eye at different depths to see different structures… “floaters” in one’s vision which everyone has experienced, are like inclusions in a gemstone…they are clumps of detatched debris or cells that can be focused on using a handheld opthalmoscope.
Every jewelry store sales person freaks out when I use one…Learning to use a handheld opthalmoscope by trial and error is not very difficult at all, or can be taught by a physcian, although a doctor will only use it for looking at eyes… the cost is in the $350 to $500 range. I have used one throughout my career… using it as well as a fixed power loupe as royjohn uses routinely, does the job…
1 Like
Ok! I’m quite intrigued on the use of a hand-held ophthalmoscope for gemology! A very ingenious approach that seems more flexible than the standard 10x Loupe.
What are the pros/cons?
Seems this could be an article for IGS just waiting to be written. 
If you ever had a complete medical eye exam, with dilation of your pupils with eye drops, by a medical doctor (opthalmologist, not optometrist) both direct and indirect opthalmoscopy should have been used… hand helds are DIRECT… meaning that the image is upright, but also virtual. Virtual, in that the virtual image is the collection of focus points made by backward extension of convergent/divergent rays. In other words, a virtual image is found by tracing real rays that emerge from an optical device the lens backward to perceived or apparent origins of ray divergence/convergence. With INDIRECT, the doc holds a hand held lens at arms length to look into dilated eyes…the image seen is upside down, but the image seen is at the real origin of the divergent/convergent rays…
the pros are that hand held ones are relatively cheap (cheapest around $250 on Amazon, up to less than $500, Welch Allen is the standard) and very portable…magnification by diopters is approximately the diopters divided by 4, plus one… 40+ gives a magnification of 11X…about as much as a 10X loupe, with maximum magnification of 15X…able to see under the surface when focused using a different lens…very easy to focus on the surface of a table, changing lenses is very easy, just spin on a wheel holding a series of lenses that click into place. Can see beneath the table to look for inclusions, growth lines… all models come with a blue filter and a slit aperture. Light source is bright, using a battery powered halogen bulb with a broad optical spectrum. Can learn to use one by trial and error, focusing on one place and changing lenses. Same kind of self training when using a loupe…Slit aperature is great for looking at the same place from different angles.
There are a lot of cons: can’t substitute for a stereomicroscope, designed for eyeballs with an average dimensions of just short of an inch… gemstones are much smaller…depth of tomographic optical field for small objects, like 1 ct. stones, limited to a couple of millimeters.
Also not as good at looking though hazy media…(which is why indirect can look through cataracts)
Have to look inside via the table only, facets too small for wide field view that is built in, slit aperture compensates some for smaller viewing surfaces… works best for people with good UNCORRECTED (no need for eye glasses) visual acuity… trying to look thru eye glasses is cumbersome, need to take them off and use negative diopters to adjust for nearsightedness…(high nearsigthness in itself is an advantage when looking at small objects without glasses, as the negative diopters gives magnification naturally…I take my glasses off to read, being high nearsighted)…
It’s use compliments that of using a high powered loupe… the analogue for INDIRECT opthalmoscopy is a loupe… the light source is external and very bright, able to see through fine haze…using both instruments together is better than just one or the other.